Lipstick on the Carpet? Simple Tricks to Kiss Stains Goodbye!

Lipstick can enhance your look, but when it ends up on your carpet, it’s a different story. Its oily and pigmented formula makes it a tough stain to remove, but with the right approach, you can tackle the mess effectively. This step-by-step guide will help you remove lipstick stains and restore your carpet to its original beauty.

Why Lipstick Stains Are Tricky

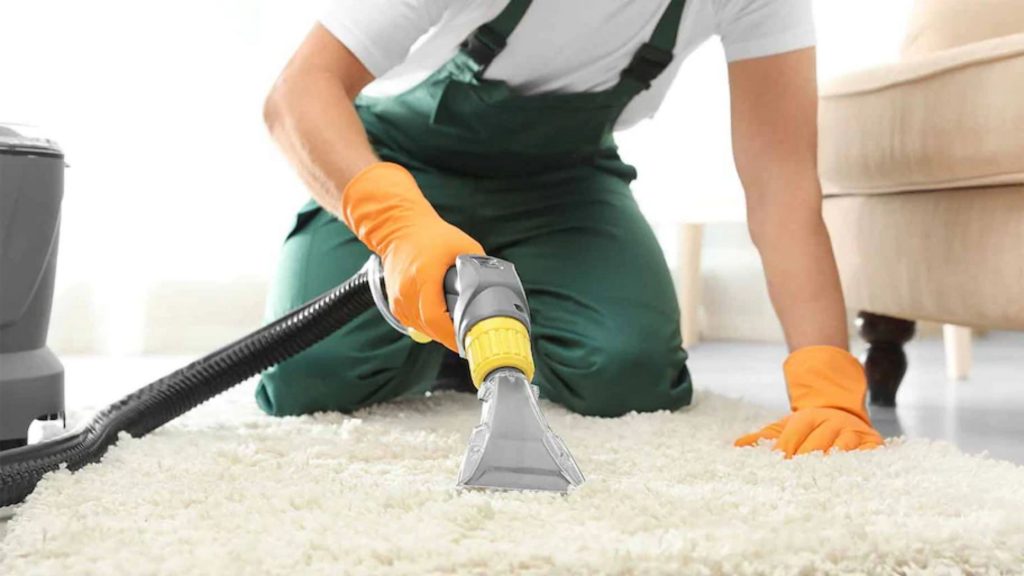
Lipstick contains a mix of oils, waxes, and strong pigments, which allows it to cling to surfaces and resist water-based cleaning. Proper Carpet Cleaning techniques are crucial to lifting these stubborn stains without spreading them further.

Step-by-Step Guide to Remove Lipstick Stains

1. Act Quickly

The sooner you treat a lipstick stain, the better your chances of removing it completely. Letting the stain sit can cause the oils and pigments to sink deeper into the carpet fibers.

2. Blot the Stain

  • Use a clean, dry cloth or paper towel to gently blot the stain.
  • Avoid rubbing, as this can push the lipstick deeper into the fibers or spread it to a larger area.

3. Scrape Off Excess Lipstick

  • If there’s any excess lipstick on the surface, carefully scrape it off with a dull knife or a spoon.
  • Be gentle to avoid damaging the carpet fibers.

4. Apply a Cleaning Solution

Prepare a cleaning solution to tackle the stain:

  • Mix a few drops of dish soap with warm water.
  • Alternatively, use rubbing alcohol or a dry-cleaning solvent for more stubborn stains.

5. Test the Solution

Before applying the cleaning solution to the stain, test it on a hidden area of the carpet to ensure it won’t cause discoloration.

6. Clean the Stain

  • Dip a clean cloth or sponge into the cleaning solution and blot the stained area gently.
  • Work from the edges of the stain toward the center to prevent it from spreading.
  • Repeat this process until the lipstick starts to lift.

7. Rinse the Area

  • Once the stain is gone, dampen a clean cloth with cold water and blot the area to remove any cleaning solution residue.
  • This step prevents leftover soap from attracting dirt.

8. Dry the Carpet

  • Use a dry towel to blot the area and absorb excess moisture.
  • Allow the carpet to air-dry completely or use a fan to speed up the drying process.

Alternative Methods for Stubborn Lipstick Stains

If the stain persists, consider these additional solutions:

  • Baking Soda and Vinegar Paste:
    • Mix baking soda and a small amount of vinegar to create a paste.
    • Apply it to the stain, let it sit for 15 minutes, and blot with a clean cloth.
  • Hairspray:
    • Spray a small amount of hairspray directly onto the stain.
    • Let it sit for a minute, then blot with a damp cloth.
  • Commercial Carpet Cleaner:
    • Use a product designed for tough stains, following the instructions on the label for best results.

Tips to Prevent Lipstick Stains on Carpets

  1. Store Makeup Away from Carpets:
    • Avoid applying or storing lipstick in carpeted areas to minimize accidents.
  2. Use Protective Mats:
    • Place a mat or towel under your workspace when doing makeup to catch any spills.
  3. Clean Spills Immediately:
    • Address stains as soon as they occur to prevent them from setting.

When to Call in Professionals

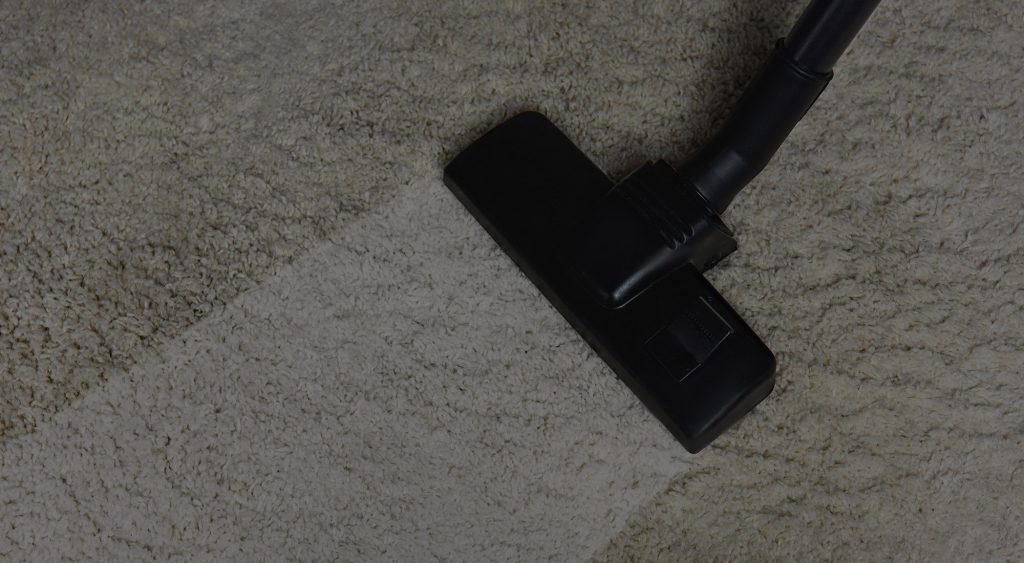
For stubborn lipstick stains or delicate carpets, it’s wise to seek expert assistance. Top-rated carpet cleaners have specialized tools and techniques to remove tough stains without causing damage to your carpet.

Why Quick Cleaning Matters

Lipstick stains are a combination of oily and pigmented elements, which makes them tricky to handle. Acting quickly and using proper cleaning methods ensures the stain doesn’t become a permanent blemish on your carpet.

Conclusion

Lipstick stains on your carpet might seem daunting, but they’re no match for the right cleaning techniques. Quick action, effective solutions, and careful handling will help you restore your carpet’s beauty. For particularly tough stains, professional help can save time and ensure the best results. With these tips, your carpet will stay fresh, clean, and free from makeup mishaps.

Published on: February 15, 2025

How to Clean a Dirty Couch with Shampoo and Baking Soda: Easy Tips!

Your couch is one of the most used pieces of furniture in your home, making it prone to spills, stains, and dirt build-up. Cleaning it regularly not only enhances its appearance but also extends its lifespan. Two simple yet effective tools for cleaning the couches are shampoo and baking soda. When used correctly, these everyday items can restore your couch to its original freshness. In this guide, we’ll show you step-by-step how to clean your couch using shampoo and baking soda, ensuring a clean and inviting space.

1. Why Use Shampoo and Baking Soda for Couch Cleaning?

Shampoo and baking soda are affordable and readily available cleaning agents that are gentle yet effective on upholstery.

Benefits of Shampoo:

  • Removes surface dirt and stains.
  • Gentle on most upholstery fabrics.
  • Leaves a fresh and clean scent.

Benefits of Baking Soda:

  • Acts as a natural deodoriser to neutralise odours.
  • Absorbs grease and grime.
  • Safe and non-toxic for use on upholstery.

When combined, these two cleaning agents provide a powerful solution for tackling dirt and odours on your couch.

2. Gather Your Supplies

Before you start, ensure you have the necessary tools and cleaning products on hand:

  • Mild upholstery or dishwashing shampoo.
  • Baking soda.
  • A vacuum cleaner with an upholstery attachment.
  • A soft brush or sponge.
  • A clean, dry cloth or towel.
  • A bowl of warm water.

3. Test a Small Area First

Not all couch fabrics are the same, and some may react differently to cleaning solutions. Before applying shampoo or baking soda to the entire couch:

  1. Choose a small, inconspicuous area, like the back or underside of a cushion.
  2. Apply a small amount of shampoo or baking soda and let it sit for a few minutes.
  3. Check for any discolouration or damage before proceeding.

4. Step-by-Step Guide to Cleaning Your Couch

Step 1: Vacuum the Couch

Start by vacuuming the entire couch to remove loose dirt, crumbs, and pet hair. Use the upholstery attachment to clean crevices, seams, and cushions thoroughly. This step ensures you’re not pushing dirt deeper into the fabric during cleaning.

Step 2: Apply Baking Soda

Sprinkle a generous amount of baking soda over the entire surface of the couch. Pay extra attention to areas with visible stains or strong odours.

  • Let the baking soda sit for 15–20 minutes to absorb odours and loosen grime.
  • Vacuum the couch again to remove the baking soda.

Step 3: Mix the Shampoo Solution

In a bowl of warm water, add a small amount of upholstery or mild dishwashing shampoo. Stir gently to create suds. Avoid using too much shampoo, as excessive soap can leave residue.

Step 4: Spot Clean Stains

Dip a soft brush or sponge into the shampoo solution and gently scrub the stained areas in circular motions. Be careful not to oversaturate the fabric, as excess moisture can lead to mildew or damage.

Step 5: Clean the Entire Couch

Using the same shampoo solution, clean the rest of the couch in sections. Wipe each section with a clean, damp cloth to remove soap residue.

Step 6: Dry the Couch

Blot the couch with a dry towel to absorb excess moisture. Open windows, turn on fans, or use a dehumidifier to speed up the drying process. Ensure the couch is completely dry before use to prevent mould or mildew growth.

5. Effective  Tips for  Cleaning the Couches

  • Read the Care Label: Always check the manufacturer’s care instructions to ensure you’re using safe cleaning methods for your couch.
  • Avoid Over-Wetting: Too much water can damage upholstery or leave behind unpleasant odours.
  • Regular Maintenance: Vacuum your couch weekly and address spills immediately to prevent stains.
  • Use a Fabric Protector: After cleaning, consider applying a fabric protector to repel stains and make future cleaning easier.

6. When to Call a Professional

While shampoo and baking soda are excellent for regular maintenance, some situations may require professional cleaning:

  • Stubborn stains that don’t come out with DIY methods.
  • Delicate or antique upholstery that requires specialised care.
  • Persistent odours that baking soda can’t eliminate.

Professional cleaning services, such as fabric-specific couch cleaning solutions in Canberra, use advanced equipment and eco-friendly solutions to deep clean your couch, ensuring it’s fresh and hygienic.

Contact Us for Professional Services

At City Carpet Cleaning Canberra, we offer professional couch cleaning services designed to tackle even the toughest stains and odours. Our team uses safe, effective methods to restore your furniture’s beauty and comfort.

Contact us today to schedule your appointment and enjoy a cleaner, fresher living space!

Conclusion

Cleaning a dirty couch doesn’t have to be complicated. With simple tools like shampoo and baking soda, you can effectively tackle dirt, stains, and odours, leaving your couch fresh and inviting. Regular maintenance, combined with professional cleaning when needed, ensures your furniture stays in top condition for years to come. Follow these easy tips and enjoy a cleaner, more comfortable home.

FAQs About Couch Cleaning

1. How often should I clean my couch?

Vacuum weekly and deep clean your couch every 6–12 months, or as needed for stains and odours.

2. Is baking soda safe for all couch fabrics?

Baking soda is generally safe for most fabrics, but always test it on a small area first to ensure it doesn’t cause discoloration.

3. How can I prevent my couch from getting dirty?

Use sofa covers, vacuum regularly, and address spills immediately to maintain cleanliness.

Published on: February 13, 2025

Budget-Friendly Blind Care: The Cheapest Way to Clean Venetian Blinds!

Venetian blinds are a popular choice for homeowners, offering style, privacy, and light control. However, their intricate slat design can make cleaning them seem like a daunting task. The good news is that keeping your Venetian blinds spotless doesn’t have to be expensive or time-consuming. With the right approach and tools, you can restore their shine without breaking the bank.

Why Regular Cleaning Is Essential for Venetian Blinds

Venetian blinds collect dust, dirt, and even grease over time, especially in kitchens and high-traffic areas. Regular cleaning is crucial for several reasons:

  1. Maintains Appearance: Clean blinds enhance the overall look of your home.
  2. Prevents Allergens: Dust buildup can harbor allergens, affecting indoor air quality.
  3. Extends Lifespan: Regular maintenance prevents dirt from damaging the blinds’ material, prolonging their life.
  4. Cost Savings: Keeping your blinds clean reduces the need for professional replacements or deep-cleaning services.

Cheapest Ways to Clean Venetian Blinds

1. Dust Them Regularly

One of the simplest and most cost-effective ways to maintain your Venetian blinds is regular dusting.

  • How to Do It:
    1. Close the blinds so all slats face the same direction.
    2. Use a microfiber cloth or a feather duster to gently wipe each slat, starting from the top.
    3. Repeat the process with the slats flipped in the opposite direction.
  • Pro Tip: Use a vacuum cleaner with a soft brush attachment for faster dust removal.

2. Spot Clean with Household Items

For small stains or spots, household items like dish soap and vinegar can work wonders.

  • How to Do It:
    1. Mix a solution of warm water and a few drops of dish soap.
    2. Dip a microfiber cloth into the solution and wring out the excess water.
    3. Wipe the stained areas gently, using a toothbrush for stubborn spots.
    4. Rinse with a clean damp cloth and allow the blinds to air dry.
  • Pro Tip: Add a splash of white vinegar to the cleaning solution for extra grease-cutting power.

3. Use Tongs and Microfiber Cloths

Create your own DIY blind-cleaning tool with items you already have at home.

  • How to Do It:
    1. Wrap microfiber cloths around the ends of kitchen tongs and secure them with rubber bands.
    2. Close the tongs over each slat and gently slide them across to remove dirt and dust.
    3. Repeat for both sides of each slat.
  • Pro Tip: This method works well for both aluminum and wooden Venetian blinds.

4. Deep Clean with a Bathtub Soak

For heavily soiled blinds, a deep clean can be done affordably in your bathtub.

  • How to Do It:
    1. Remove the blinds from the window and lay them flat in your bathtub.
    2. Fill the tub with warm water and a small amount of mild detergent.
    3. Let the blinds soak for 30 minutes to loosen dirt and grime.
    4. Use a soft sponge to gently scrub each slat, then rinse with clean water.
    5. Dry the blinds with a towel before rehanging them.
  • Pro Tip: Avoid this method for wooden blinds, as prolonged exposure to water can warp the material.

5. Steam Clean for a Chemical-Free Option

Steam cleaning is an affordable and eco-friendly way to clean your Venetian blinds.

  • How to Do It:
    1. Use a handheld steam cleaner with a fabric-safe attachment.
    2. Hold the steamer a few inches away from the blinds and move it across each slat.
    3. Wipe away loosened dirt with a clean microfiber cloth.
  • Pro Tip: Steam cleaning is perfect for removing grease and stubborn stains from kitchen blinds.

Tips for Maintaining Venetian Blinds

  1. Dust Weekly: Regular dusting prevents the buildup of grime and reduces the need for deep cleaning.
  2. Control Humidity: Use a dehumidifier to prevent moisture damage, especially for wooden blinds.
  3. Keep Windows Clean: Clean windows regularly to prevent dirt from transferring to your blinds.
  4. Inspect Regularly: Check for signs of wear, such as bent slats or frayed cords, and address them promptly.

When to Seek Professional Help

While these DIY methods are effective for regular maintenance, some situations require professional assistance:

  • Stubborn Dirt or Grease: Professional services can tackle deep-seated grime.
  • Delicate Materials: Wooden or high-end blinds may need specialized care.
  • Convenience: If you lack the time or equipment, hiring professionals is a hassle-free option.

For affordable and reliable help, consider cheap curtain cleaning services in your area that also specialize in blinds.

Why Regular Cleaning Saves Money

Investing time in regular cleaning saves money in the long run by:

  1. Extending Lifespan: Prevents damage that could lead to costly replacements.
  2. Avoiding Repairs: Regular maintenance reduces the risk of wear and tear.
  3. Minimizing Professional Costs: Clean blinds are easier to maintain, reducing the frequency of professional services.

Conclusion

Keeping your Venetian blinds clean doesn’t have to be expensive or labor-intensive. By incorporating these budget-friendly methods into your routine, you can maintain the beauty and functionality of your blinds without spending a fortune. From simple dusting techniques to DIY tools and household solutions, these tips ensure your blinds stay spotless and last longer.

For heavily soiled blinds or those made from delicate materials, professional Curtain Cleaning services offer expert care at an affordable price. Whether you choose to tackle the task yourself or call in the pros, regular cleaning is key to enjoying pristine Venetian blinds and a healthier home.

Published on: February 12, 2025

Fresh & Natural: The Ultimate Guide to Cleaning Your Cotton Mattress!

Cotton mattresses are known for their natural comfort, breathability, and durability. However, like any other mattress, they require regular care to maintain their freshness and longevity. Since cotton is a natural material, it can absorb moisture, dust, and allergens over time, which makes proper cleaning essential.

Why Clean Your Cotton Mattress Regularly?

Your mattress plays a significant role in your sleep quality and overall health. Over time, dust, sweat, and bacteria can accumulate, leading to odors, stains, and potential health risks. Regular Mattress Cleaning ensures:

  • A healthier sleeping environment.
  • Reduction in allergens, dust mites, and bacteria.
  • Prevention of stains and odors.
  • Prolonged lifespan of your cotton mattress.

Natural Cleaning Tips for Your Cotton Mattress

Follow these simple and eco-friendly steps to clean your cotton mattress effectively:

1. Remove and Wash All Bedding

Begin by stripping your mattress of all bedding, including sheets, blankets, and mattress covers. Wash them in hot water with a gentle, eco-friendly detergent to kill bacteria and dust mites.

If your mattress cover is removable, check its care label and follow the washing instructions carefully.

2. Vacuum the Mattress Thoroughly

Use a vacuum cleaner with an upholstery attachment to remove dirt, dust, and debris from the mattress surface. Pay special attention to seams and crevices, where dust and allergens tend to accumulate. Regular vacuuming keeps your mattress fresh and reduces the need for deep cleaning.

3. Spot Clean Stains Naturally

Accidental spills or stains can happen, but they don’t have to ruin your cotton mattress. Here’s how to spot clean using natural solutions:

  1. Blot the Stain: Use a clean cloth or paper towel to absorb as much of the spill as possible. Avoid rubbing, as it can spread the stain further.
  2. Prepare a Natural Cleaner: Mix equal parts white vinegar and water or use baking soda with water to create a paste.
  3. Apply Gently: Dab the solution onto the stained area with a cloth or sponge. Let it sit for 15-20 minutes.
  4. Rinse and Dry: Wipe away the cleaning solution with a damp cloth, then pat the area dry with a towel. Allow it to air dry completely.

For tougher stains or deep cleaning, consider Steam Cleaning for Mattresses, as steam effectively removes bacteria and allergens without the use of chemicals.

4. Deodorize with Baking Soda

Cotton mattresses can absorb odors over time. Baking soda is a natural and safe deodorizer that neutralizes smells without harsh chemicals.

  1. Sprinkle a generous layer of baking soda over the entire mattress surface.
  2. Let it sit for several hours, or overnight for stronger odors.
  3. Vacuum thoroughly to remove the baking soda, leaving your mattress smelling fresh.

5. Air Out the Mattress

Fresh air and sunlight are natural disinfectants. Whenever possible, place your mattress in a well-ventilated area or outdoors under indirect sunlight. Sunlight kills bacteria and mold spores while fresh air helps eliminate trapped odors.

If outdoor airing isn’t an option, open the windows in your bedroom and use a fan to improve airflow around the mattress.

6. Rotate the Mattress

To ensure even wear and prevent sagging, rotate your cotton mattress every 3-6 months. Flipping the mattress may also be necessary if it’s designed for double-sided use.

Preventive Tips to Keep Your Cotton Mattress Clean

  • Use a Mattress Protector: A waterproof, breathable protector shields your mattress from spills, stains, and dust.
  • Wash Bedding Regularly: Clean sheets, blankets, and covers at least once a week to prevent dirt and sweat from accumulating.
  • Avoid Eating or Drinking in Bed: Minimize the risk of spills and stains by keeping food and drinks away from the mattress.
  • Vacuum Monthly: Regular vacuuming keeps your mattress free from dust and allergens.

When to Call in the Professionals

While regular cleaning can keep your cotton mattress fresh, some situations require professional help. Consider hiring experts if:

  • You’re dealing with stubborn stains or odors that won’t go away.
  • The mattress hasn’t been cleaned in years and needs a deep refresh.
  • There’s visible mold, mildew, or extensive damage.

Benefits of Regular Cotton Mattress Cleaning

  1. Healthier Sleep Environment: Reduce allergens, dust mites, and bacteria for a cleaner space.
  2. Longer Mattress Lifespan: Proper maintenance ensures your mattress stays in good condition for years.
  3. Improved Comfort and Hygiene: A clean mattress enhances your sleeping experience.

Conclusion

Cleaning your cotton mattress doesn’t have to be complicated. With these natural tips, you can maintain a fresh and healthy sleeping environment for years to come. Regular vacuuming, spot cleaning, deodorizing, and airing out your mattress are simple yet effective steps to keep it in top shape. For tougher stains or deep cleaning needs, professional Mattress Cleaning services like Steam Cleaning for Mattresses can ensure a thorough and safe refresh.

Published on: February 10, 2025

Cat Chaos? Here’s How to Easily Clean Vomit from Carpets, Rugs, and Furniture!

Cats are wonderful companions, but dealing with occasional messes, like vomit, is a part of pet ownership. Whether it’s on your carpet, rug, or furniture, cat vomit can leave behind stains and odors if not cleaned up properly. The good news is, with the right tools and techniques, you can handle these accidents quickly and effectively, keeping your home fresh and clean.

This guide will walk you through simple steps to remove cat vomit from carpets, rugs, and furniture while protecting the fibers and fabrics from damage.

Why Cleaning Cat Vomit Quickly Is Essential

Cat vomit contains acidic substances that can discolor and damage your carpets, rugs, and furniture if left untreated. Acting promptly not only prevents stains but also ensures there’s no lingering odor. Quick action minimizes the mess and keeps your home looking and smelling its best.

How to Clean Cat Vomit from Carpets and Rugs

Here’s a step-by-step guide to tackle cat vomit on your carpets and rugs effectively:

1. Remove the Solid Waste

Start by removing as much of the solid waste as possible.

  • What You’ll Need: Gloves, paper towels, or a plastic scraper.
  • Steps:
    1. Put on gloves to protect your hands.
    2. Use a paper towel or scraper to gently lift the solid pieces of vomit.
    3. Avoid pressing down, as this can push the vomit deeper into the fibers.

Dispose of the waste in a sealed bag to reduce odor.

2. Blot the Area

After removing the solids, blot the area to absorb any excess liquid.

  • What You’ll Need: A clean cloth or paper towels.
  • Steps:
    1. Gently blot the affected area to soak up as much liquid as possible.
    2. Do not rub, as this can spread the stain or damage the fibers.

Blotting helps to minimize the stain and prepare the area for cleaning.

3. Apply a Cleaning Solution

Choose a gentle cleaning solution to break down the stain and neutralize odors.

  • Homemade Solution: Mix 1 tablespoon of dish soap, 1 tablespoon of white vinegar, and 2 cups of warm water.
  • Steps:
    1. Dampen a clean cloth with the solution and blot the stained area.
    2. Let the solution sit for 5–10 minutes to loosen the stain.
    3. Use a damp cloth to blot and remove the solution, followed by a dry towel to absorb moisture.

For tough stains, consider using an enzymatic cleaner designed to break down organic matter.

4. Deodorize with Baking Soda

Baking soda is a natural and safe way to remove lingering odors.

  • Steps:
    1. Sprinkle baking soda generously over the cleaned area.
    2. Let it sit for 15–20 minutes, or longer for strong odors.
    3. Vacuum the area thoroughly to remove the baking soda.

This step ensures your carpet or rug smells fresh and clean.

How to Clean Cat Vomit from Furniture

Cleaning vomit from furniture requires extra care to avoid damaging the upholstery:

1. Remove Excess Vomit

Use gloves and a paper towel to gently lift the solids without pushing them into the fabric.

2. Blot the Area

Blot the affected area with a clean, dry cloth to absorb liquid without spreading the mess.

3. Use an Upholstery Cleaner

Choose a cleaner designed for your specific furniture material:

  • Fabric Upholstery: Use a mild detergent mixed with water or an upholstery cleaner.
  • Leather or Faux Leather: Wipe the area with a damp cloth and mild soap, followed by a dry towel.

Always test any cleaning solution on an inconspicuous area first to avoid discoloration.

4. Dry Thoroughly

Use a fan or open windows to ensure the area dries completely. Moisture left behind can lead to mold or mildew.

When to Call Professional Cleaners

While DIY methods work for most messes, some situations call for professional assistance:

  • Tough Stains: If a stain persists despite your best efforts, professional cleaners can help.
  • Delicate Materials: Antique or high-value rugs and furniture require expert handling to avoid damage.
  • Persistent Odors: For strong, lingering smells, professional deodorizing techniques are more effective.

Look for trusted Professional Rug Cleaners in Canberra for expert care. They have the tools and knowledge to restore your carpets, rugs, and furniture to their original condition.

Tips for Preventing Future Accidents

  1. Monitor Your Cat’s Health: Vomiting can sometimes indicate health issues. Consult your veterinarian if it happens frequently.
  2. Place Rugs Strategically: Use washable rugs or mats in areas where accidents are more likely to occur.
  3. Clean Regularly: Routine cleaning of carpets, rugs, and furniture can help prevent odors and stains from building up.

Common Mistakes to Avoid

To ensure effective cleaning, avoid these common errors:

  1. Using Harsh Chemicals: Bleach and other strong cleaners can damage fibers and discolor fabrics.
  2. Scrubbing Stains: Scrubbing can fray fibers and make the stain worse. Always blot gently.
  3. Ignoring the Mess: Leaving vomit untreated can lead to permanent stains and odors.

By avoiding these mistakes, you can protect your carpets, rugs, and furniture while keeping them clean.

Benefits of Prompt Cleaning

  • Maintains Appearance: Quick cleaning prevents stains and keeps your home looking fresh.
  • Improves Air Quality: Removing vomit eliminates odors and bacteria that can affect indoor air quality.
  • Extends Lifespan: Proper care protects the fibers and fabrics, ensuring they last longer.

Conclusion

Dealing with cat vomit on carpets, rugs, and furniture may not be pleasant, but it’s manageable with the right approach. By acting quickly, using gentle cleaning solutions, and deodorizing with baking soda, you can effectively remove stains and odors without damaging your belongings.

For tougher stains or delicate items, don’t hesitate to contact Professional rug cleaners for expert care. With their help and your proactive cleaning efforts, you can keep your home looking and smelling fresh, even with a furry friend around.

Published on: February 8, 2025

Timber Shine: Expert Tips for Polishing Your Floors to Perfection!

Timber floors are a beautiful and timeless feature in any home. However, over time, even the most durable timber floors can lose their luster. Regular polishing helps restore the shine and maintains the wood’s natural beauty. Polishing not only enhances the look of your floors but also protects them from dirt, stains, and damage caused by wear and tear.

Why Should You Polish Timber Floors?

Polishing your timber floors has several benefits:

  • Restores Shine: Over time, timber floors can become dull due to foot traffic and dirt. Polishing brings back the natural shine.
  • Protects the Surface: Polishing creates a protective layer that helps shield your floors from dirt, moisture, and scratches.
  • Enhances Aesthetic Appeal: Well-maintained timber floors can transform the look of your home, adding warmth and elegance to your space.

Tools and Materials You’ll Need

Before you start polishing your timber floors, gather the following tools and materials:

  • Broom or Vacuum: To clean the floor before polishing.
  • pH-Neutral Wood Cleaner: To remove any dirt or grime from the surface.
  • Soft Mop: To apply the cleaning solution.
  • Polish: Choose a wood polish suitable for your floor type (e.g., oil-based or water-based polish).
  • Microfiber Cloths: For buffing and applying the polish evenly.
  • Floor Buffer (Optional): For larger areas, a floor buffer can help apply the polish evenly and provide a professional finish.

Step-by-Step Guide to Polishing Timber Floors

1. Clean the Floor Thoroughly

  • Before you begin polishing, it’s important to clean your timber floor thoroughly. Dirt and debris can scratch the surface during polishing, so use a broom or vacuum to remove any dust and particles.
  • Mop the floor with a pH-neutral wood cleaner to remove dirt and stains. Allow the floor to dry completely before moving on to the next step.

2. Choose the Right Polish

  • Select a wood polish that is compatible with your timber floor. There are various types of polishes, such as oil-based or water-based. It’s essential to pick the right one based on the finish of your floor.
  • Oil-Based Polish: Offers a deep, rich finish and is great for older timber floors.
  • Water-Based Polish: Provides a clear finish and is ideal for newer, less porous timber floors.

3. Apply the Polish

  • Pour a small amount of polish onto the floor in one area at a time. Use a microfiber cloth or soft mop to apply the polish evenly in the direction of the wood grain.
  • Work in small sections, making sure not to apply too much polish at once. Overapplying can cause streaks and uneven results.
  • Allow the polish to sit for the recommended time as per the product instructions. This allows it to penetrate and bond with the wood surface.

4. Buff the Floor

  • Once the polish has dried, buff the floor with a clean microfiber cloth or use a floor buffer if you’re working with a large area. Buffing helps to smooth out the polish and achieve an even, glossy finish.
  • Buff in a circular motion to ensure that the polish is spread evenly across the surface.

5. Let the Polish Dry

  • Allow the floor to dry completely before walking on it. Depending on the type of polish used, this could take anywhere from a few hours to a day. Avoid placing heavy furniture or rugs on the floor until it’s fully dry to prevent damaging the finish.

Tips for Maintaining Timber Floors

  1. Regular Cleaning
    • Sweep or vacuum your timber floors regularly to remove dirt, dust, and debris. This prevents scratches and keeps the floors looking clean.
  2. Wipe Spills Immediately
    • Timber floors are susceptible to water damage, so always clean up spills immediately to prevent staining or warping.
  3. Use Rugs and Mats
    • Place rugs and mats at high-traffic areas, such as entrances and hallways, to reduce the wear and tear on your timber floors.
  4. Avoid Harsh Chemicals
    • Use cleaning products specifically designed for wood floors. Harsh chemicals can damage the finish and cause discoloration.
  5. Reseal the Floor Periodically
    • Depending on the amount of traffic your floors get, consider resealing the floor every 1-2 years to maintain its protection and shine.

When to Call in the Professionals

While regular tile cleaning and polishing can be done by homeowners, there are times when you may need professional help. If your timber floors have significant damage, deep stains, or you need local same-day grout cleaning, it’s best to contact a professional. They have the right tools and expertise to restore your floors to their original beauty without causing damage.

Conclusion

Polishing timber floors is an excellent way to enhance their appearance and protect them from daily wear and tear. With the right tools and techniques, you can achieve a beautiful, shiny floor that adds warmth and character to your home. Regular cleaning, polishing, and proper maintenance will ensure your timber floors continue to shine for years to come. For more extensive cleaning or restoration needs, don’t hesitate to contact local same-day grout cleaning services for professional assistance.

Published on: January 31, 2025

Furry Mishaps? Easy Ways to Repair Pet-Damaged Carpet Like a Pro!

Pets bring joy and companionship, but they can also be tough on your carpets. Scratches, chew marks, and stains are common issues pet owners face. While replacing the entire carpet may seem like the only solution, there are easy and effective ways to repair pet damage and restore your flooring to its original condition.

Common Types of Pet Damage on Carpets

Understanding the different types of damage will help you choose the best repair method:

  1. Scratched or Torn Carpet Fibers – Pets, especially dogs and cats, may scratch or dig at carpets, causing fraying and bald patches.
  2. Chewed or Ripped Sections – Puppies and kittens often chew on carpet edges, leaving noticeable damage.
  3. Stubborn Pet Stains and Odors – Urine, vomit, and other accidents can leave stains and lingering odors if not cleaned properly.
  4. Loose or Lifted Carpet at Doorways – Pets trying to get into a closed room may claw at the edges, causing the carpet to lift or tear.

Easy DIY Carpet Repair Methods

1. Fixing Small Scratches and Frayed Carpet

For minor scratches or loose fibers:

  • Use scissors to trim frayed fibers carefully.
  • Apply a fabric glue or carpet adhesive to secure the edges and prevent further unraveling.
  • Use a fine-tooth comb to blend the repaired area with the rest of the carpet.

2. Patching Torn or Chewed Carpet

If your pet has chewed through a section of your carpet, patching is the best solution. Here’s how to do it:

  1. Cut out the damaged section in a square or rectangle shape.
  2. Find a matching carpet remnant or cut a patch from an inconspicuous area (like inside a closet).
  3. Apply carpet tape or adhesive on the back of the patch.
  4. Press the patch firmly into place and blend the fibers using a comb or roller.

3. Removing Pet Stains and Odors

Pet accidents can leave unsightly stains and bad smells. To clean them effectively:

  • Blot the stain immediately with a clean cloth—never rub.
  • Mix equal parts vinegar and water and spray on the stain. Let it sit for a few minutes, then blot with a dry towel.
  • Sprinkle baking soda on the area to absorb odors and vacuum after a few hours.
  • For deep stains, use an enzyme-based cleaner designed for pet messes.

4. Reattaching Loose Carpet at Doorways

If your pet has pulled up the carpet near a doorway, follow these steps:

  • Lift the loose section and remove any debris underneath.
  • Apply double-sided carpet tape or adhesive to secure the edges.
  • Use a heavy object to press it down until it sets properly.
  • If the damage is severe, a professional re-stretching service may be required.

When to Call a Professional Carpet Repair Service

While DIY fixes work for minor damage, severe pet-related carpet issues often require expert intervention. Here’s when you should call a professional:

  • The damage covers a large area or is beyond basic patching.
  • Persistent pet odors remain even after deep cleaning.
  • The carpet has visible wrinkles, requiring stretching.
  • You want a seamless repair that blends perfectly with the existing carpet.

Carpet Repair Solutions in Canberra offer specialized services to restore your carpet, making it look as good as new. Experts use advanced tools and techniques to fix extensive damage effectively.

Tips to Prevent Future Pet Damage

  1. Train Your Pets – Teach them to use scratching posts and chew toys instead of carpets.
  2. Trim Their Nails Regularly – This reduces scratching and accidental carpet damage.
  3. Use Area Rugs or Runners – Place rugs in high-traffic pet areas to protect your main carpet.
  4. Clean Accidents Immediately – Quick action prevents stains from setting in.
  5. Consider a Carpet Protector Spray – This adds a layer of protection against pet-related wear and tear.

Conclusion

Pet-damaged carpets don’t have to mean expensive replacements. With simple DIY techniques and professional repair services, you can fix scratches, stains, and tears efficiently. Regular carpet cleaning, proper pet training, and preventative measures will help maintain your carpet’s durability and keep it looking fresh for years.

Published on: January 29, 2025

Spot the Scams: Tips to Avoid Carpet Cleaning Rip-Offs

Professional carpet cleaning services are essential for maintaining clean and fresh carpets. However, like any service industry, there are unscrupulous operators who overcharge or deliver substandard results. Knowing how to identify and avoid carpet cleaning rip-offs can save you money, frustration, and ensure you get the high-quality service you deserve. Here’s how to protect yourself and make an informed choice.

1. Research and Compare Companies

Before hiring a carpet cleaning service, take time to research your options:

  • Check Reviews and Ratings: Look for companies with consistently positive reviews on trusted platforms like Google, Yelp, or Facebook. Be cautious of businesses with overwhelmingly perfect reviews, as they may not be genuine.
  • Seek Recommendations: Ask friends, family, or neighbours for recommendations based on their experiences with carpet cleaning services.
  • Compare Services: Obtain quotes from multiple companies and compare their offerings, methods, and pricing. This ensures you understand the market rate and don’t overpay for subpar services.

2. Beware of Unrealistically Low Prices

One of the most common cleaning scams involves offering services at extremely low prices to lure customers in. Once they’re in your home, they may upsell additional services or claim your carpets require extra treatments, inflating the final cost.

Tip: If a quote seems too good to be true, it likely is. Always ask for a detailed breakdown of what the quoted price includes to avoid surprise charges later.

3. Understand the Cleaning Method

Different carpet cleaning methods deliver different results. Unscrupulous operators might use ineffective methods that provide a superficial clean but leave dirt and residues behind. Common methods include:

  • Steam Cleaning (Hot Water Extraction): This is the most effective and widely recommended method for deep cleaning carpets.
  • Dry Cleaning: A quicker method that uses minimal water and is suitable for delicate carpets.
  • Encapsulation: A low-moisture method ideal for regular maintenance.

Ensure the company explains their cleaning method and why it’s appropriate for your carpet.

4. Verify Credentials and Certifications

Reputable carpet cleaning companies employ trained technicians certified by recognised organisations, such as the Institute of Inspection, Cleaning and Restoration Certification (IICRC). These certifications indicate the company follows industry standards and employs skilled professionals.

Ask the company about their certifications, training, and experience before booking a service.

5. Avoid High-Pressure Sales Tactics

Some carpet cleaning companies use high-pressure sales tactics to upsell unnecessary services or treatments. For instance, they might insist that you need special stain guards, additional cleaning solutions, or carpet deodorisers.

Tip: If you feel pressured to agree to extra services, take a step back and ask for time to consider. A trustworthy company will provide clear explanations and give you time to decide.

6. Read the Fine Print

Before booking a service, carefully read the company’s terms and conditions, including cancellation policies, guarantees, and refund options. Ensure you understand what is included in the quoted price and whether there are additional fees for services like:

  • Moving furniture.
  • Treating tough stains.
  • Cleaning high-traffic areas.

Clear communication helps you avoid unexpected costs and misunderstandings.

7. Confirm the Use of Safe and Eco-Friendly Products

Low-quality cleaning products can damage your carpet, leave residue, or pose risks to your family and pets. Reputable cleaning companies use eco-friendly, non-toxic products that are safe for all household members.

Ask the Company: Inquire about the cleaning solutions they use and whether they are safe for children and pets.

8. Ask About Guarantees

A reputable carpet cleaning company should stand behind their work. Look for a provider that offers a satisfaction guarantee or warranty. This ensures that if you’re unhappy with the results, they will re-clean the affected areas or provide a refund.

Tip: Ask for details about their guarantee policy and how they handle complaints or issues.

9. Trust Your Instincts

Sometimes, your instincts can tell you whether a company is trustworthy. If a company seems evasive about their methods, pricing, or credentials, it’s best to look elsewhere. A reliable  service will be transparent, professional, and willing to answer all your questions.

Contact Us for Trusted Cleaning Services

At City Carpet Cleaning Canberra, we prioritise honesty, transparency, and exceptional results. With years of experience, certified technicians, and eco-friendly solutions, we deliver high-quality Reliable Carpet Cleaners Near Canberra you can trust.

Contact us today for a no-obligation quote and experience the difference of working with a reliable and professional team.

Conclusion

Avoiding carpet cleaning rip-offs requires careful research, clear communication, and an understanding of the services offered. By checking reviews, verifying credentials, and avoiding companies that use high-pressure tactics or unrealistic pricing, you can find a trustworthy provider. Professional cleaning is an investment in the longevity and appearance of your carpets, so choose a company that values transparency and quality.

FAQs About Avoiding Carpet Cleaning Rip-Offs

1. How can I spot a cleaning scam?

Be wary of extremely low prices, high-pressure sales tactics, or companies that are evasive about their credentials and methods.

2. Should I ask for a written estimate?

Yes, always request a detailed written estimate to understand what is included in the price and avoid hidden fees.

3. How often should I have my carpets professionally cleaned?

It’s recommended to have your carpets cleaned every 12–18 months, or more frequently in high-traffic areas or homes with pets.

Published on: January 28, 2025

How to Get Your Rental Bond Back: Cleaning Tips When Moving Out

Whenever we are moving out of our old house we need to get the house cleaned. Everyone wants their house to be cleaned before the tenant leaves the house. The first thing you need to do to get your bond and deposit back is to make a cleaning checklist. A cleaning checklist will not only help in cleaning the house but will also be helpful in making a perfect plan for cleaning. This in other terms is also known as an end-of-lease carpet stain cleaning. In this blog, we have come up with the best cleaning tips when moving out. It includes carpets, mattresses, upholsteries, rugs, and tiles.

Cleaning Tips When Moving Out

Some Important Things To Keep In Mind Before Moving Out- 

  • Remove all the nails, screws, and other stuff from the walls.
  • Use a cloth or brush to dust all the parts of the house. 
  • Use a vacuum to clean the house properly and remove all the dust and dirt. 
  • Use scrub for cleaning the refrigerators, pans, and other stuff. 
  • Clean the exhaust fan properly as it contains more dust. 

Clean From Top To Bottom- Always make sure to clean each and every part of the house neatly. Clean each and every corner of the house properly. You can use a vacuum or other tools for cleaning. You can also use home remedies for safe and secure cleaning. 

Clean And Sanitise The Carpet And Floor- The carpet and floor are the most exposed part of a house and should be taken care of properly. Regular mopping or carpet cleaning can be helpful. There are various products available in the market that are useful for effective sanitization of the floor. 

Clean And Fix The Walls- Walls might have holes and other damage. Make sure you clean the walls properly. Many Landlords will also have problems with the small holes present in the walls. Fix these holes before handing over the keys to the landlord.

Clean The Windows- Windows also catch a lot of dust and debris. You should clean them regularly so that you won’t require last-minute cleaning for the windows. You can vacuum regularly for the windows. 

Clean The Bathroom- The bathroom can be the hardest place to clean. There are a lot of areas in the bathroom that are hard to clean. Use effective cleaners to get rid of all the stains in the bathroom. 

Take Pictures When Finished- After everything, take pictures of everything you have cleaned. Take pictures of all the corners of the house to make sure you have all the evidence for the landlord before moving out. Take professional advice about how to and which places should be covered while taking photos.

Take Professional Help For End Of Lease Cleaning

When we hand over the house to the owner we need to clean the house completely. Professionals can help in providing the best end-of-lease carpet cleaning services in Canberra. They have proper knowledge about all types of cleaning services and also the techniques. With the help of the best tools, professional cleaners clean all the areas and also take care of sanitization of the things. Professionals will also give you advice about how to keep the surroundings clean. Carpet steam cleaning professionals will also help you by providing cleaning tips when moving out.

Published on: November 23, 2023

5 Benefits Of Home Carpet Cleaning

No doubt, carpet cleaning has the capability to improve your home’s appearance. But, when it comes to doing it, many people avoid it or delay it. Well, it is totally understandable because home carpet cleaning takes a lot of time & energy. Ignoring it is not good, as it can cause a major impact on your health and daily hygiene. There are lots of benefits of home carpet cleaning which you can’t ignore in this article. We will share 5 benefits of home carpet cleaning. So that you may not think to avoid it even in your dreams.

Timely, home carpet cleaning is very important, whether you do it or you hire someone. Well, professional carpet cleaners give better or more visible results than DIY cleaning. As they are experts in cleaning with their Local Carpet Cleaner Near Me. They not only improve your home appearance but also improve the air quality of your home. They also keep you or your family members healthy. So, let’s see some of the benefits of home carpet cleaning: 

Benefits Of Home Carpet Cleaning
Home Carpet Cleaning
  1. Carpet cleaning leads to a major improvement in the air quality of your home: If you vacuum your carpets frequently, then, that’s good. But it only removes the dirt laying on the upper surface of your carpets. It improves the air quality of your home. So, one of the benefits of home carpet cleaning is that your indoor air quality improves which keeps you or your family members healthy. If you will not do home carpet cleaning, then contaminants will keep settling into your carpet fibers. It will decrease the indoor quality inside your home and you or your family members will fall ill.
  2. Removal of toxic trapped particles is one of the health benefits of steam carpet cleaning: Siding, dust, or dirt, there are many other contaminants that are lurking or hiding in the fiber of your carpet. Some of the harmful contaminants are pet dander, lead, or cockroach allergens. These contaminants can be very toxic to health, so removing them becomes very mandatory, and doing home carpet cleaning will help you to do it. You can also call professionals to do home carpet cleaning, they will do the job better than you, as they are trained.
  3. Regular cleaning prevents the growth of mold in the carpets: If carpets are wet or exposed to moisture and you live in a humid area, then, it will be a good condition for molds to get formed. So, to avoid it, regular home carpet cleaning is very important.
  4. Cleaning prevents dust mite infestation: Dust mites are very tiny creatures, and it is very hard to see them with our eyes. But, they stay laying on the carpets and can cause severe allergic problems to you or your loving family members. Regular home carpet cleaning helps to prevent dust mites from lurking on the carpet.
  5. Carpet cleaning prevents infections among kids: If you have a small kid in your home, then, carpet dry cleaning should be your priority, as it knocks out all allergens laying up on your carpets and prevents infections from happening to your kid.

Conclusion

So, these are the 5 benefits of home carpet cleaning. We hope that this article made you understand how home carpet cleaning is beneficial. Do hire professionals to get the home carpet cleaning job done. So contact us as soon as possible to solve your problem.

Published on: November 23, 2023